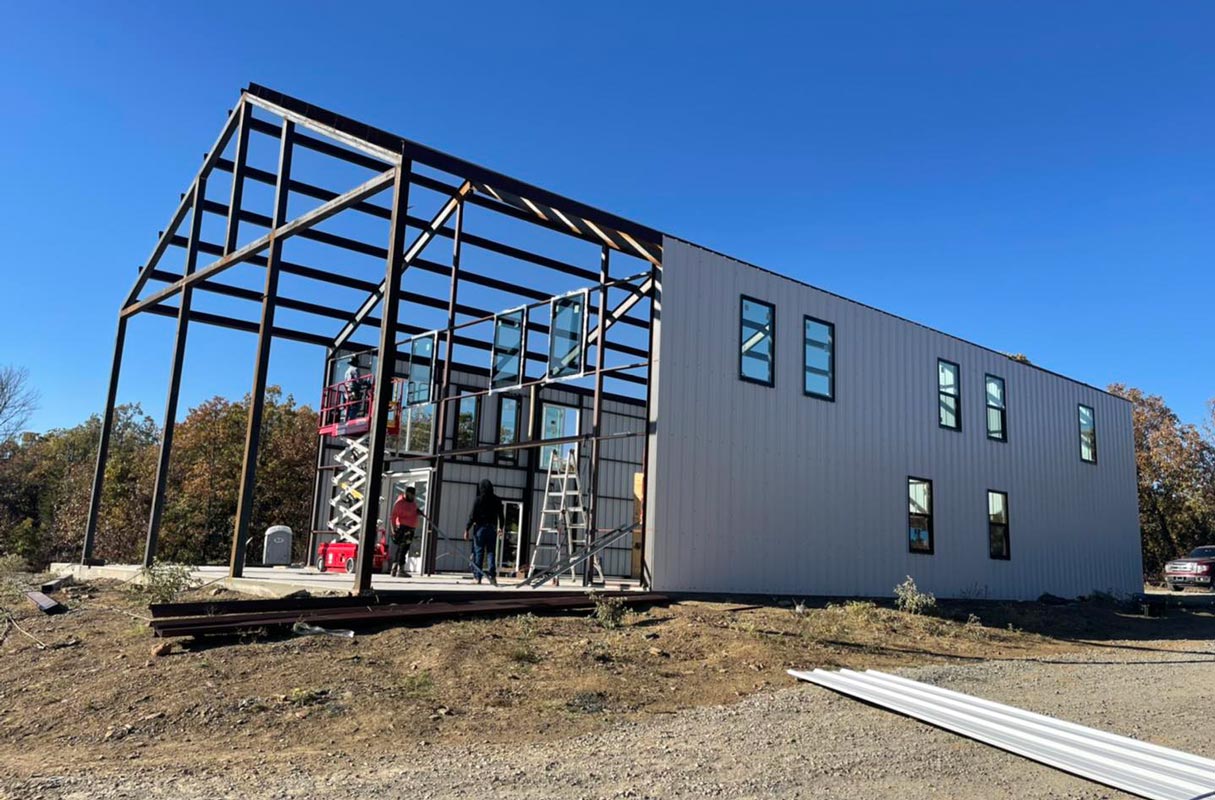
Building with steel has become one of the most popular ways to create durable, cost-effective spaces — whether it’s a backyard garage, a full-scale workshop, a storage barn, or even a barndominium. One of the biggest appeals of steel building kits is that many of them are designed with DIY assembly in mind, giving you the freedom to construct your own structure without relying entirely on contractors.
This guide will walk you through everything you need to know about assembling a steel building kit yourself. From preparation and tools, to step-by-step construction, to common mistakes to avoid, this article is designed to serve as your go-to resource.
Why Choose a DIY Steel Building Kit?
- Cost Savings: Doing the labor yourself can save thousands compared to hiring a full construction crew.
- Flexibility: Work at your own pace and schedule without being at the mercy of contractor timelines.
- Satisfaction: There’s pride in walking into a shop or barn you built with your own hands.
- Durability: Steel is resistant to rot, pests, and weather damage — making it one of the longest-lasting building options available.
Step 1: Planning & Preparation
- Check Local Permits & Codes
Every jurisdiction is different. Before you break ground, ensure your design meets zoning requirements, setbacks, and load ratings (snow/wind). - Site Preparation
- Clear the land and remove vegetation.
- Ensure the soil is compacted and level.
- Plan drainage around the slab or piers.
- Foundation Choice
Most DIY kits require either a concrete slab or pier system. A slab provides maximum stability, while piers may work for smaller barns and sheds.
Step 2: Tools & Equipment You’ll Need
- Basic: Tape measure, level, chalk line, framing square.
- Power: Impact wrench, drill with metal bits, circular saw with metal blade.
- Safety: Hard hats, gloves, goggles, steel-toe boots.
- Lifting: Scaffolding or a rented forklift for larger trusses and panels.
💡 Pro Tip: Even if the kit is marketed as “DIY-friendly,” expect to need 2–3 helpers for raising walls, setting trusses, and installing roof panels.
Step 3: Unpacking & Inventory
When your kit arrives:
- Lay out all components.
- Cross-check against the bill of materials.
- Store panels and framing on wood blocks, not directly on the ground, to avoid scratching or condensation damage.
Step 4: Frame Assembly
- Anchor Bolts
Begin by setting anchor bolts in your slab or piers — perfectly aligned with the base rails. - Base Rails & Columns
Secure the base rails to anchors. Attach vertical columns, ensuring plumb alignment. - Wall Girts & Roof Purlins
Install horizontal supports that stiffen walls and roof. These pieces also create mounting points for sheeting.
Step 5: Roof & Trusses
- Raise trusses carefully with a lift or scaffolding.
- Bolt securely to column tops.
- Install purlins across trusses for panel support.
- Check squareness at every stage — a crooked frame now will cause headaches later.
Step 6: Wall & Roof Sheeting
- Begin wall sheeting from one corner, working panel by panel.
- Overlap panels per manufacturer instructions to ensure water resistance.
- Fasten with self-tapping screws and rubber washers to prevent leaks.
- Install roof panels last, making sure overlaps face away from prevailing winds.
Step 7: Doors, Windows & Trim
- Frame openings before sheeting when possible.
- Install pre-hung doors or roll-up garage doors per kit instructions.
- Add windows with proper flashing.
- Finish with trim, gutters, and downspouts.
Step 8: Insulation (Optional But Recommended)
For barns, shops, or barndominiums, insulation is key:
- Options: Spray foam, fiberglass blankets, reflective insulation.
- Benefits: Keeps space warm in winter, cool in summer, and reduces condensation.
Common DIY Mistakes to Avoid
- Skipping permits → can lead to stop-work orders.
- Improper foundation → causes alignment issues.
- Over-tightening screws → damages washers and invites leaks.
- Not checking square frequently → small errors compound as you build.
Cost & Time Considerations
- Cost Savings: DIY labor can save 30–40% of project costs.
- Timeline: A small shop (~30×40) may take 7–10 days with 3–4 people. Larger barns or barndominiums can take weeks.
Long-Term Maintenance
- Inspect screws annually and tighten if needed.
- Touch up paint on scratches to prevent rust.
- Clear debris from roof and gutters regularly.
- Re-seal around doors/windows every few years.
Final Thoughts
DIY steel building assembly isn’t for everyone, but if you’re comfortable with tools, have a few helping hands, and want to save significantly on labor, it can be a rewarding, cost-effective project. With proper preparation and attention to detail, you’ll end up with a shop, barn, or garage that will last decades — and the pride of knowing you built it yourself.

